Map appearance (Core & Plus)

CIMS Plus users are able to control their space colors and background appearance.
Map appearance basics
The map appearance is controlled by the "Map settings" popup. Click on your username in the top-right corner of your screen, then click "Map settings". This will open a popup with options to control space status colors and the map background.
Space colors

Each space status is assigned a color, making it easy to tell at a glance what spaces in your cemetery are available, sold, etc.
To change a space status color, scroll to the "Space status colors" section of the map settings popup and click on the block of color next to the status you want to change. Use the color picker to choose a new color, then click the grey "Choose" button. To save your changes, click the green "Save" button in the lower-right corner of the map appearance popup.
An alternate way to change space colors in CIMS Plus is to use the space status legend.
Map background & drone photos

You may want to change the background of your map. To do so, choose an option from the "Map background" section. All cemeteries have the choice of "Solid color" or "Google Maps". If you choose "Solid color", you can specify the background color. If using Google Maps, you can specify the opacity of the map. Click the option you would like to use as the background, then click "Save".
If your cemetery chose to have a drone photograph your cemetery, you will have the option "Orthophoto" (meaning drone photo). Drone photos will be more accurate than Google Maps imagery and more consistent, as Google does periodically update their images and you may find the season has changed, or your background images have shifted. Want to learn more about drone photos? Read our drone photography documentation.
CIMS Plus cemeteries with an orthophoto have an alternate way to toggle between the orthophoto and Google Maps as their background. In the "Map" tab, a globe button in the upper-left map controls can be clicked to toggle between backgrounds.
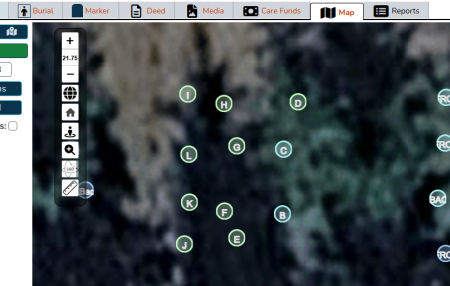
Google Maps satellite imagery may be of low quality.
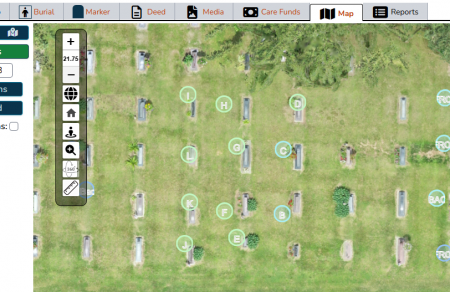
With drone imagery taken by the CIMS team, the background is of much higher resolution and better quality. This image will also not update unpredictably, as Google Maps images might.
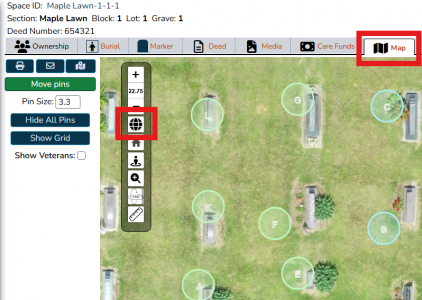
To toggle between drone imagery and Google Maps, click the globe icon in the map controls area in the "Map" tab. Note: Must have purchased an orthophoto.


