Map features
You may want to display trees, benches, fire hydrants and other objects visually on your CIMS map. This is what map features are for!
Add a map feature
- In the top navigation bar, click "Map features". From the dropdown, click "New map feature".
- Your default map feature shape will appear on the map. Use the options in the right-hand flyout to change the feature shape, color, size and rotation. Change the position of the map feature using controls in the right-hand flyout or simply clicking on the map. Select a feature type from the dropdown, then click "Save".
- Don't see the feature type you'd like to use as an option in the dropdown? Click the navy plus button to the right of the dropdown to open a popup that will allow you to add a new feature type.
Your map feature has been saved to the database and will appear on your map!
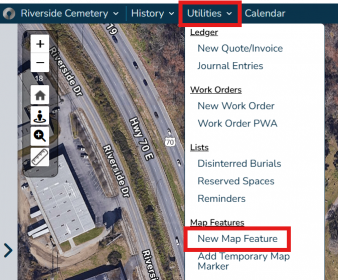
To add a new map feature, click "Map features" from the navigation bar, then "New map feature".
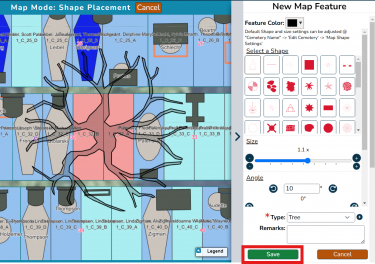
Customize your map feature, including changing the color, shape, size, position and rotation. Choose a type (in the above case, it's a tree), then click "Save".
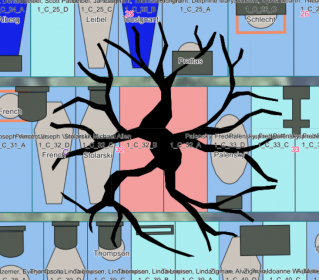
Your map feature will appear as a solid shape on your map! In this case, the tree shape helps us understand why two of our spaces are marked as restricted.


Edit a map feature
To edit a map feature, first click on it on the map to load its information in the right-hand flyout.
Edit a feature's shape, including its color, position and rotation, by clicking the navy "Edit feature shape" button near the top of the flyout. Edit other fields associated with the map feature by clicking on the fields in question, making your changes, and clicking "Update".
Add media

Just like with spaces, burials, markers and more, you can choose to add media to a map feature. Click on the map feature on your map to load its information in the right-hand flyout. Scroll down to the Feature media section and click the navy "Add media" button. Upload a file or use your device's camera to take an image, then click "Save".